Thermal paste test 2023
If you put together a gaming computer yourself, sooner or later you will inevitably come across the thermal paste. Often the pastes included, as well as those already applied to the boxed coolers, are rather poor in terms of heat dissipation. To overclock your components, you need a thermal paste that works really well. In our test, we took a close look at the best thermal pastes in 2023 and compared them based on the most important criteria.
In this test you will not only find the best thermal paste, but also instructions on how to use it correctly. We have put together a comprehensive guide that includes the different pastes and how to apply, remove or renew them correctly. In the FAQs you will find answers to the most important questions. Enough of the preamble, let's get started with the best products from the field of cooling paste test.
The best thermal paste at a glance
| # | Preview | Products | ||
|---|---|---|---|---|
| 1 |

|
ARCTIC MX-4 (4g) - Premium Performance... |
|
Buy now " |
| 2 |

|
ARCTIC MX-6 (4g) - Ultimate Performance... |
|
Buy now " |
| 3 |
|
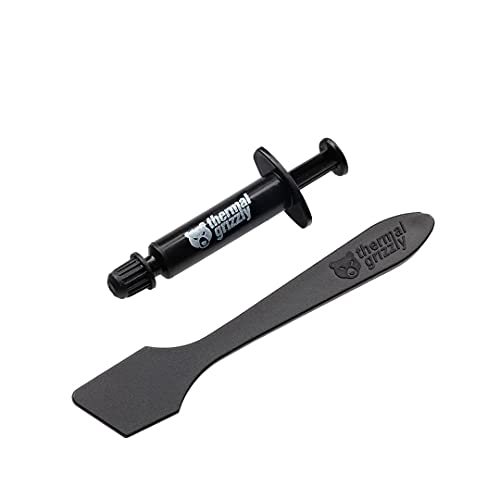
Thermal Grizzly Kryonaut thermal compound - 1 gram... |
|
Buy now " |
| 4 |

|
ARCTIC MX-4 (incl spatula, 4 g) - Premium... |
|
Buy now " |
| 5 |

|
AABCOOLING Thermal Grease 100g - thermal paste... |
|
Buy now " |
| 6 |

|
ARCTIC MX-4 (8g) - Premium Performance... |
|
Buy now " |
| 7 |
![Silverbead thermal compound [3 pieces]...](https://m.media-amazon.com/images/I/41JSpZLwV-L.jpg)
|
Silverbead thermal compound [3 pieces]... |
|
Buy now " |
| 8 |

|
ARCTIC MX-6 (8g) - Ultimate Performance... |
|
Buy now " |
| 9 |

|
BSFF thermal compound, 5.5g CPU paste... |
|
Buy now " |
| 10 |

|
ARCTIC MX-6 (4 g, incl. 6 MX Cleaner) - Ultimate... |
|
Buy now " |
Thermal Paste Guide: Everything You Should Know!
Why are thermal greases so important?
Surely everyone has asked themselves why a good thermal paste is used at all. The CPU or the GPU are as flat as a board and even the inexpensive cooler is smooth as an eel. These are also extremely polished. But in practice it all looks different. A cooler does not always lie 100% precisely on a chip, and cooling units or chips also have almost unrecognizable gaps that cannot be seen with the naked eye. And that's where the paste comes in. We cannot use air as a heat conductor.
If the thermal paste is not applied, the small layers of air between the cooler and the CPU / GPU ensure that the heat cannot be dissipated properly. As a result, the temperatures rise and this gnaws at the service life of the components. It can also increase the noise level of your computer. Modern coolers adapt to the specific temperature, so even a small temperature difference can have a big impact.
Still looking for the right processor for thermal paste? Then check out ours CPU comparison !
High Performance Thermal Compound - Which Material is Best?
When I assembled my first computer myself, an Intel Celeron 233, it was easy to get an overview of the various thermal pastes. However, today I don't remember which paste I used back then. Today the market looks very different. Many different manufacturers offer a variety of different thermal paste. The most important are the ingredients that are used in the pastes.
metal thermal paste
The best way to conduct heat from the chip to the cooler is to use a metal-based thermal compound. A mixture of different metals is used in these pastes to ensure proper function.
Ceramic thermal pastes
Arctic Silver 5 is one of the best-selling thermal pastes. It consists mainly of silver and also contains zinc oxide, aluminum oxide, boron nitride and polyol ester. But why is a paste consisting of 99,9% silver called ceramic paste? This is because the substances zinc oxide, aluminum oxide and boron nitride are referred to by the manufacturers as "ceramic particles". Although they occur in a very low dose, they still affect the way the thermal paste works. Despite everything, the Arctic Silver 5 is a paste that is not electrically conductive. Especially if you are new to thermal paste, this can be a huge benefit.
Beware of confusion: "Arctic" who are known for the pastes MX4 and MX2 are not the producers of Arctic Silver 5. This is made by another company, namely "Arctic Silver, Inc." manufactured. So be careful!
Silicone thermal pastes
The last light in our list is the silicone thermal compound. We can recommend the Thermal Grizzly Kryonaut as a good silicone thermal compound. Although it also contains aluminum and zinc oxide, for example, it has very good properties due to the silicone-based production. It is very soft and is therefore very suitable for application. Another plus point is that the paste does not dry out a bit, even under heavy loads.
Metal, ceramic or silicone paste - which one is right for me?
Which paste you use now also depends on what you prefer. If you are already experienced in using pastes and want to get the maximum performance, then you should use a metal paste. Good silicone or ceramic pastes are completely sufficient for low temperatures and heavy overclocking. They are also much easier to use. Here is a small overview of the performance of the various pastes: The Liquid Ultra (metal) performs with 38.4 W/mK, the Thermal Grizzly Kryonaut (silicone) with 12.5 W/mK and the Arctic Silver 5 (ceramic) with 9.0 W/mK. That looks extremely low, but 9.0 W/mK is already an extremely impressive value. (You will get more detailed information on this)
How do I properly apply the thermal grease?
As with many things, there are many different methods of applying thermal paste. Below we show you the methods that are most commonly used. All techniques require that you have completely cleaned the CPU and the cooler. You can use special cleaning agents or pure alcohol for this. You can also sand down the surfaces before cleaning. Some manufacturers of good pastes recommend this and include suitable sandpaper (should always be extra fine) or metal sponges.
point method
With this technique, you put a blob of thermal paste in the middle of the chip (we will also use this term in the following paragraphs, although it is actually called a headspreader, except for decapitated CPUs) and press it on with a Plexiglas disk. The spot (should be circular) should now cover almost the entire CPU. What's not so good about this technique is that the corners still end up free of thermal paste. There you have to enter paste afterwards and press these areas together again.
5 point method
With this method, the paste spreads over the chip with almost no gaps. You make a blob in the middle and one in each of the four corners. If you now press this on with the plexiglass pane, a continuous film is created. This method has proven itself many times, but it also needs a bit of post-processing here and there.
X method
As the letter X already shows, you make an X with the paste on the chip. So connect the corners together. The decisive factor here is how much paste you use. The less paste and therefore thinner you can get the X, the better. If you now press the X with your plexiglass pane, you will get a complete film over the entire chip.
spatula method
Some pastes come with plastic tips or spatulas when you buy them. This accessory should make it easier for you to fully apply without a gap. If you didn't get a spatula, you can make one yourself. Often the CPUs or random access memory packed in thick cardboard. Simply cut a spatula out of it. It is important to apply only a small amount of paste to the spatula in order to be able to distribute it evenly. For the perfect end result, simply press on with the Plexiglas pane.
Metal Thermal Paste - Not without my cotton swab
The application of metal thermal pastes differs in a few ways from the methods of ceramic or silicone pastes. The metal thermal paste has a significantly lower viscosity. This means you only have to place a very small amount in the middle of the chip. Then you grab a cotton swab and spread the paste meticulously on its surface. As we have already pointed out, it is extremely important to be very careful with this paste. So take enough time to distribute everything perfectly and without gaps
Thermal paste FAQ – You have to pay attention to this
What is the right amount?
Better too much than too little does not apply here at all. Basically, you should always make sure that you only apply as much paste as is needed. Because the point of the matter is to even out small bumps between the chip and the cooler. But if you now apply large amounts of paste, firstly you increase the distance, and secondly the excess paste runs out on your side. If you use silicone or ceramic paste, nothing on your hardware will be damaged, but you have the paste everywhere you don't want it. However, if you work with a metal paste, extreme caution is required and it is extremely important to only apply very small amounts.
It can also happen that too little paste is used. Then the result is not satisfactory either. So when applying the paste, try to cover the entire chip (headspreader) with a film so that there are no gaps.
It's best if you slowly approach the whole thing. When overclocking, it's also very important that you monitor the temperature once you've assembled your system. We use HWMonitor and GPU-Z for this.
How careful do I have to be?
Carefulness is one of the most important factors for a successful application of the paste during this work. We are not only talking about even and complete application. Get everything ready and try to prepare the chip and the cooler optimally. Use the extra fine sandpaper or the metal sponge to sand down both components. Before you apply the paste, you have to meticulously clean all surfaces. Use a special cleaning agent or isopropyl alcohol for this. Moisten a paper towel with the agent and wipe it over the surfaces to be cleaned. Once you have applied the thermal paste, place the cooler very carefully. The contact pressure of the cooler must be rock solid.
Do I need to renew my thermal paste?
Yes, the thermal paste must be renewed at specified intervals. However, there is no precise rule. However, gamblers often speak of a new order at intervals of at least 2 years. The best way to find out for yourself is to check the temperatures of your software from time to time. If the levels have increased compared to when you started after application, the coolers may have to work harder to keep the heat down. In this case you unscrew your system and apply new paste.
You can easily remove the thermal paste from our comparison with a paper towel mixed with alcohol. The pastes are sold in a size that allows repeated use. So don't throw away the paste after the first application. Keep track of the temperatures and renew the paste if necessary.
I'm not an overclocker - do I still need a high performance thermal compound?
No. But we want to say that these products are not very expensive compared to the prices you might pay for your components. You don't have to worry about the price of thermal paste and you can easily choose an expensive version. We have found that the pastes that are already included are often not really the best. If you still want to save a few euros, we have another recommendation for you. In the 4 gram tube, the Arctic MX-2 is the best solution for bargain hunters. With 5.6 W/mK it comes with a very good thermal conductivity. If you're not an overclocker then the 4 gram tube is just what you need and will last a while too. Our absolute recommendation for the average consumer.
Can I only use thermal paste on the CPU?
You can also use thermal paste in other places, for example if the cooling capacity between a component and a cooler needs to be increased. For the gamers among us, the thermal paste is basically only used for the CPU and graphics card. With the CPU, the paste must be applied as the CPU and the fan are installed separately in the computer. Not everyone dares to use the graphics card, which is understandable. Because with her, a very expensive component has to be dismantled first.
This is not only an exciting option for gamers on the computer, but also for gamers on the consoles like Xbox One or PS4. Even these devices can get pretty hot. If you dare or if the guarantee has already expired, you can still do something with the Next Gen with the paste in terms of temperature, for example. By applying the paste, the fans can be relieved somewhat.
Does the thermal paste develop its full capacity immediately after application?
There will probably never be a clear answer to that. When the thermal paste starts to work effectively is and remains a myth for the time being. Some say after 2-3 days and others say it takes a few hours for the paste to reach its full capacity. However, since the thermal paste is designed not to change its consistency over a long period of time, such an assumption makes little sense.
So you can conclude that just as the paste comes out of the tube, it also delivers the full capacity. However, there is sometimes no evidence of the so-called “burn-in” time (delay to full capacity). The composition of the paste used, i.e. its ingredients, will probably also be decisive for this. However, we could not find any evidence of anything like the “burn-in” time for the 5 thermal compounds we are talking about here.
Alternative & supplement to the paste - thermal pads
Applying thermal paste is by no means for everyone. If you don't trust yourself to do the whole thing and don't want to just go to your expensive components with spatula and paste, then you can switch to the thermal pads. Of course, they are not as effective as the pastes in terms of their effectiveness, but they are still impressive.
In order to recommend you an alternative, we have searched for the two best versions for you that you can use on a CPU without any worries. If your budget allows a bit more and you don't like to handle the paste, then there are definitely recommendable alternatives among the thermal pads. For overclockers, however, thermal paste on the CPU and graphics card is essential.
| # | Preview | Products | ||
|---|---|---|---|---|
| 1 |

|
ADWITS 9 Pack Assorted Thickness 0,5 1,0 1,5mm... |
|
Buy now " |
| 2 |

|
ARCTIC TP-3 Thermal Pad: Premium Performance... |
|
Buy now " |
| 3 |

|
ARCTIC TP-3 Thermal Pad: Premium Performance... |
|
Buy now " |
| 4 |
|
Thermal Pad, 30 pieces of thermally conductive... |
|
Buy now " |
| 5 |

|
Aairhut 4-Pack 13W/mK thermal pads, 100 x 100mm... |
|
Buy now " |
| 6 |

|
HASAYAKI 30 pack thermal pads, 20 x 67 mm x 5... |
|
Buy now " |
| 7 |

|
30 pieces 67 x 20 mm silicone thermal pad... |
|
Buy now " |
| 8 |

|
Aukuoy pack of 4 thermal pads: 100 x 100 x 0,5... |
|
Buy now " |
| 9 |

|
SANTOO 100 x 100 x 1mm Thermal Pad... |
|
Buy now " |
| 10 |

|
POPPSTAR 6X thermal pad for M.2 SSD (3... |
|
Buy now " |
Does the thermal paste develop its full capacity immediately after application?
Often you see that thermal pads on graphics Cards, chipsets on the MoBo or the main memory. However, many use the pads incorrectly and therefore we will briefly explain how to use the pads correctly. A thermal pad only works in the combination of a heat sink and an electronic component. In addition to thermal paste, they are responsible for filling gaps between these components. If you simply apply the pads to chips or other heat-generating components, the heat-conducting effect will not occur.
However, pads can also make sense if they are used on a graphics card. In most cases, the RAM is installed flat next to the graphics card and generates considerable heat. Really practically every graphics board is provided with a metal cover on the back. You can attach the pad there after you have removed the foil, which is often located on the graphics chip casing. Cut the pads correctly and place them exactly at the level of the RAMs.
Once you've done that, you can reattach the metal shroud so it makes contact with the pads. To ensure maximum effectiveness, you should apply thermal paste to the graphics chip as you do to the CPU. Attached you will find a video that explains exactly how to proceed. The video also uses the Thermal Grizzly Kryonaut along with the Arctic Thermal Pad. This also confirms the listings in our thermal paste article.